

Have you made and scanned a gorgeous painting, but want to make it even more useable? Maybe you want to use it in your branding or as a logo? Transparent backgrounds are super useful for graphic designers and creative types of all stripes! So how do you remove those pesky backgrounds in Photoshop?
I have three methods that you can use, and they range from super easy to more advanced. If you want to skip forward to the BEST method, go on and skip to Method 3. Join me as we talk this through!
Method 1- Multiply.
This is the easiest method of making an image transparent. It works great if you’re trying to just make two images that already have white backgrounds sit close together without any interfering white boxes around them, or if you don’t need to have any overlapping effects on the image. However, it does come with some drawbacks if you want two images to interact.

As you can see, the Multiply style shows all the details in both images by “multiplying” the colors together. This can be used to fantastic effect if you want to apply an effect to an image, but sometimes it might not be what you are looking to do. If not, proceed on to method # 2 or #3!
Are you still with me? Good! Let’s do this thing.
First, create a new image in Photoshop. I am using the default “Letter” page size as if I were going to print out this image in a standard printer with 8.5×11″ paper.

I am using my watercolor lemon clip art sets to demonstrate all the steps for this tutorial- if you like them, check them out! (They have transparent backgrounds already, so that’s a bonus!)
Insert your images that you are wanting to make transparent. If you don’t have images with pure white backgrounds, then check out my tutorial on how to handle raw scans in Photoshop.
In my case, that’s two of my lemon paintings. For the sake of this tutorial, I re-saved them as JPEGs with standard white backgrounds. Place them into your document by going to file> Place or dragging and dropping them in via Finder or a Window.
Turn off visibility for the background layer- you’ll see it in the Layers Panel. You’ll have to right click on the background layer (or control click if you’re on a mac with right click disabled) and click “Layer from background” and then “OK” to allow you to toggle visibility for the background layer. It’s an eye, and you’ll see that when you click it, suddenly a checkered pattern appears on your document. Congrats! That’s a visualization of transparency in Photoshop!

Now add your images to your document. You can do this via File> Place or you can drag and drop your image into your document from Finder or an explorer Window.
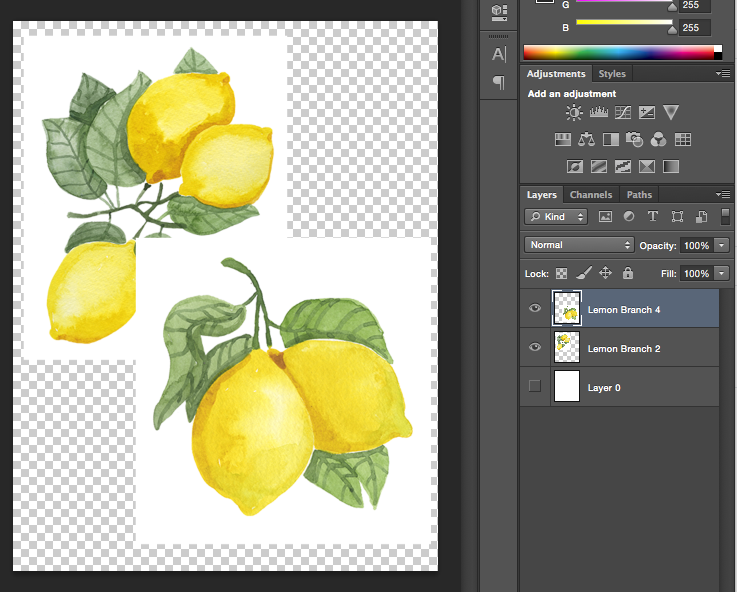
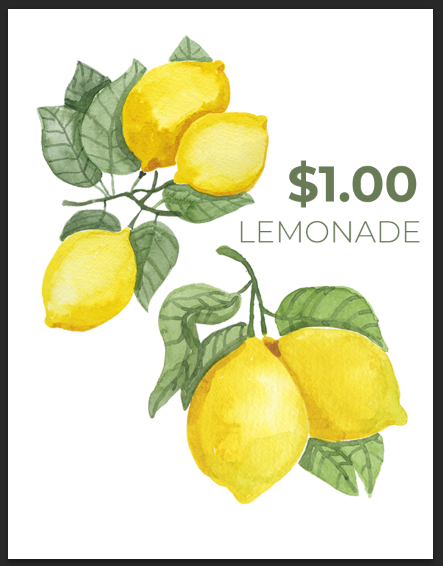
Notice how the two lemons in the front image have a white background that is overlapping the three in the back? You can change the Layer Style by going to the Layer Style panel (it will probably say “Normal” on it before you do anything else) and clicking “Multiply.”

Suddenly, you see the white box is no longer taking over the other lemon painting! You can do this for images with white backgrounds that you’d like to get a little cozier with one another. Logos should probably be handled with “real” transparency. In a pinch, or if you’re in a hurry, this method will work!
Pro Tip: Try using Multiply for digital textures and colors you’d like to see on top of photos for a cool, modern effect! You can also check out what the rest of the settings in the Layer Effects panel can do for your images- some of the coolest graphics I’ve ever seen have been made using this function!
To create this Lemonade sign, I turned visibility of the background back on, and added two text layers. Now all there is to do is print!
Method 2- Cut out using the Magic Wand Tool or the Selection Tool.
This method is quite useful, but there are a lot of potential pitfalls to it that you would be wise to avoid. No worries, I will walk you through it!
The magic wand tool is aptly named. It can select parts of an image based on similarities in color. If you have an image that has a white or solid colored background, you can use this tool to make your image transparent!
BLOG POST IN PROGRESS! 🙂 Thanks for reading what I have got so far!
-Molly